Meet Capture Note.
Download the preview, unzip it, and move Capture Note.app into Applications. Open it from there.
Capture Note lives in your menu bar. After the welcome tour, it waits quietly for your next capture. You can reopen the tour from Getting Started in the Capture Note menu.
This preview isn’t Apple notarized yet. Your browser or macOS may block it. It requires macOS 26 or later and Apple silicon.
The first time you capture, allow Capture Note in System Settings → Privacy & Security → Screen & System Audio Recording. Quit and reopen Capture Note if macOS asks you to.
Want to explore first? Choose Help → Try a Sample. No capture or microphone permission is needed.
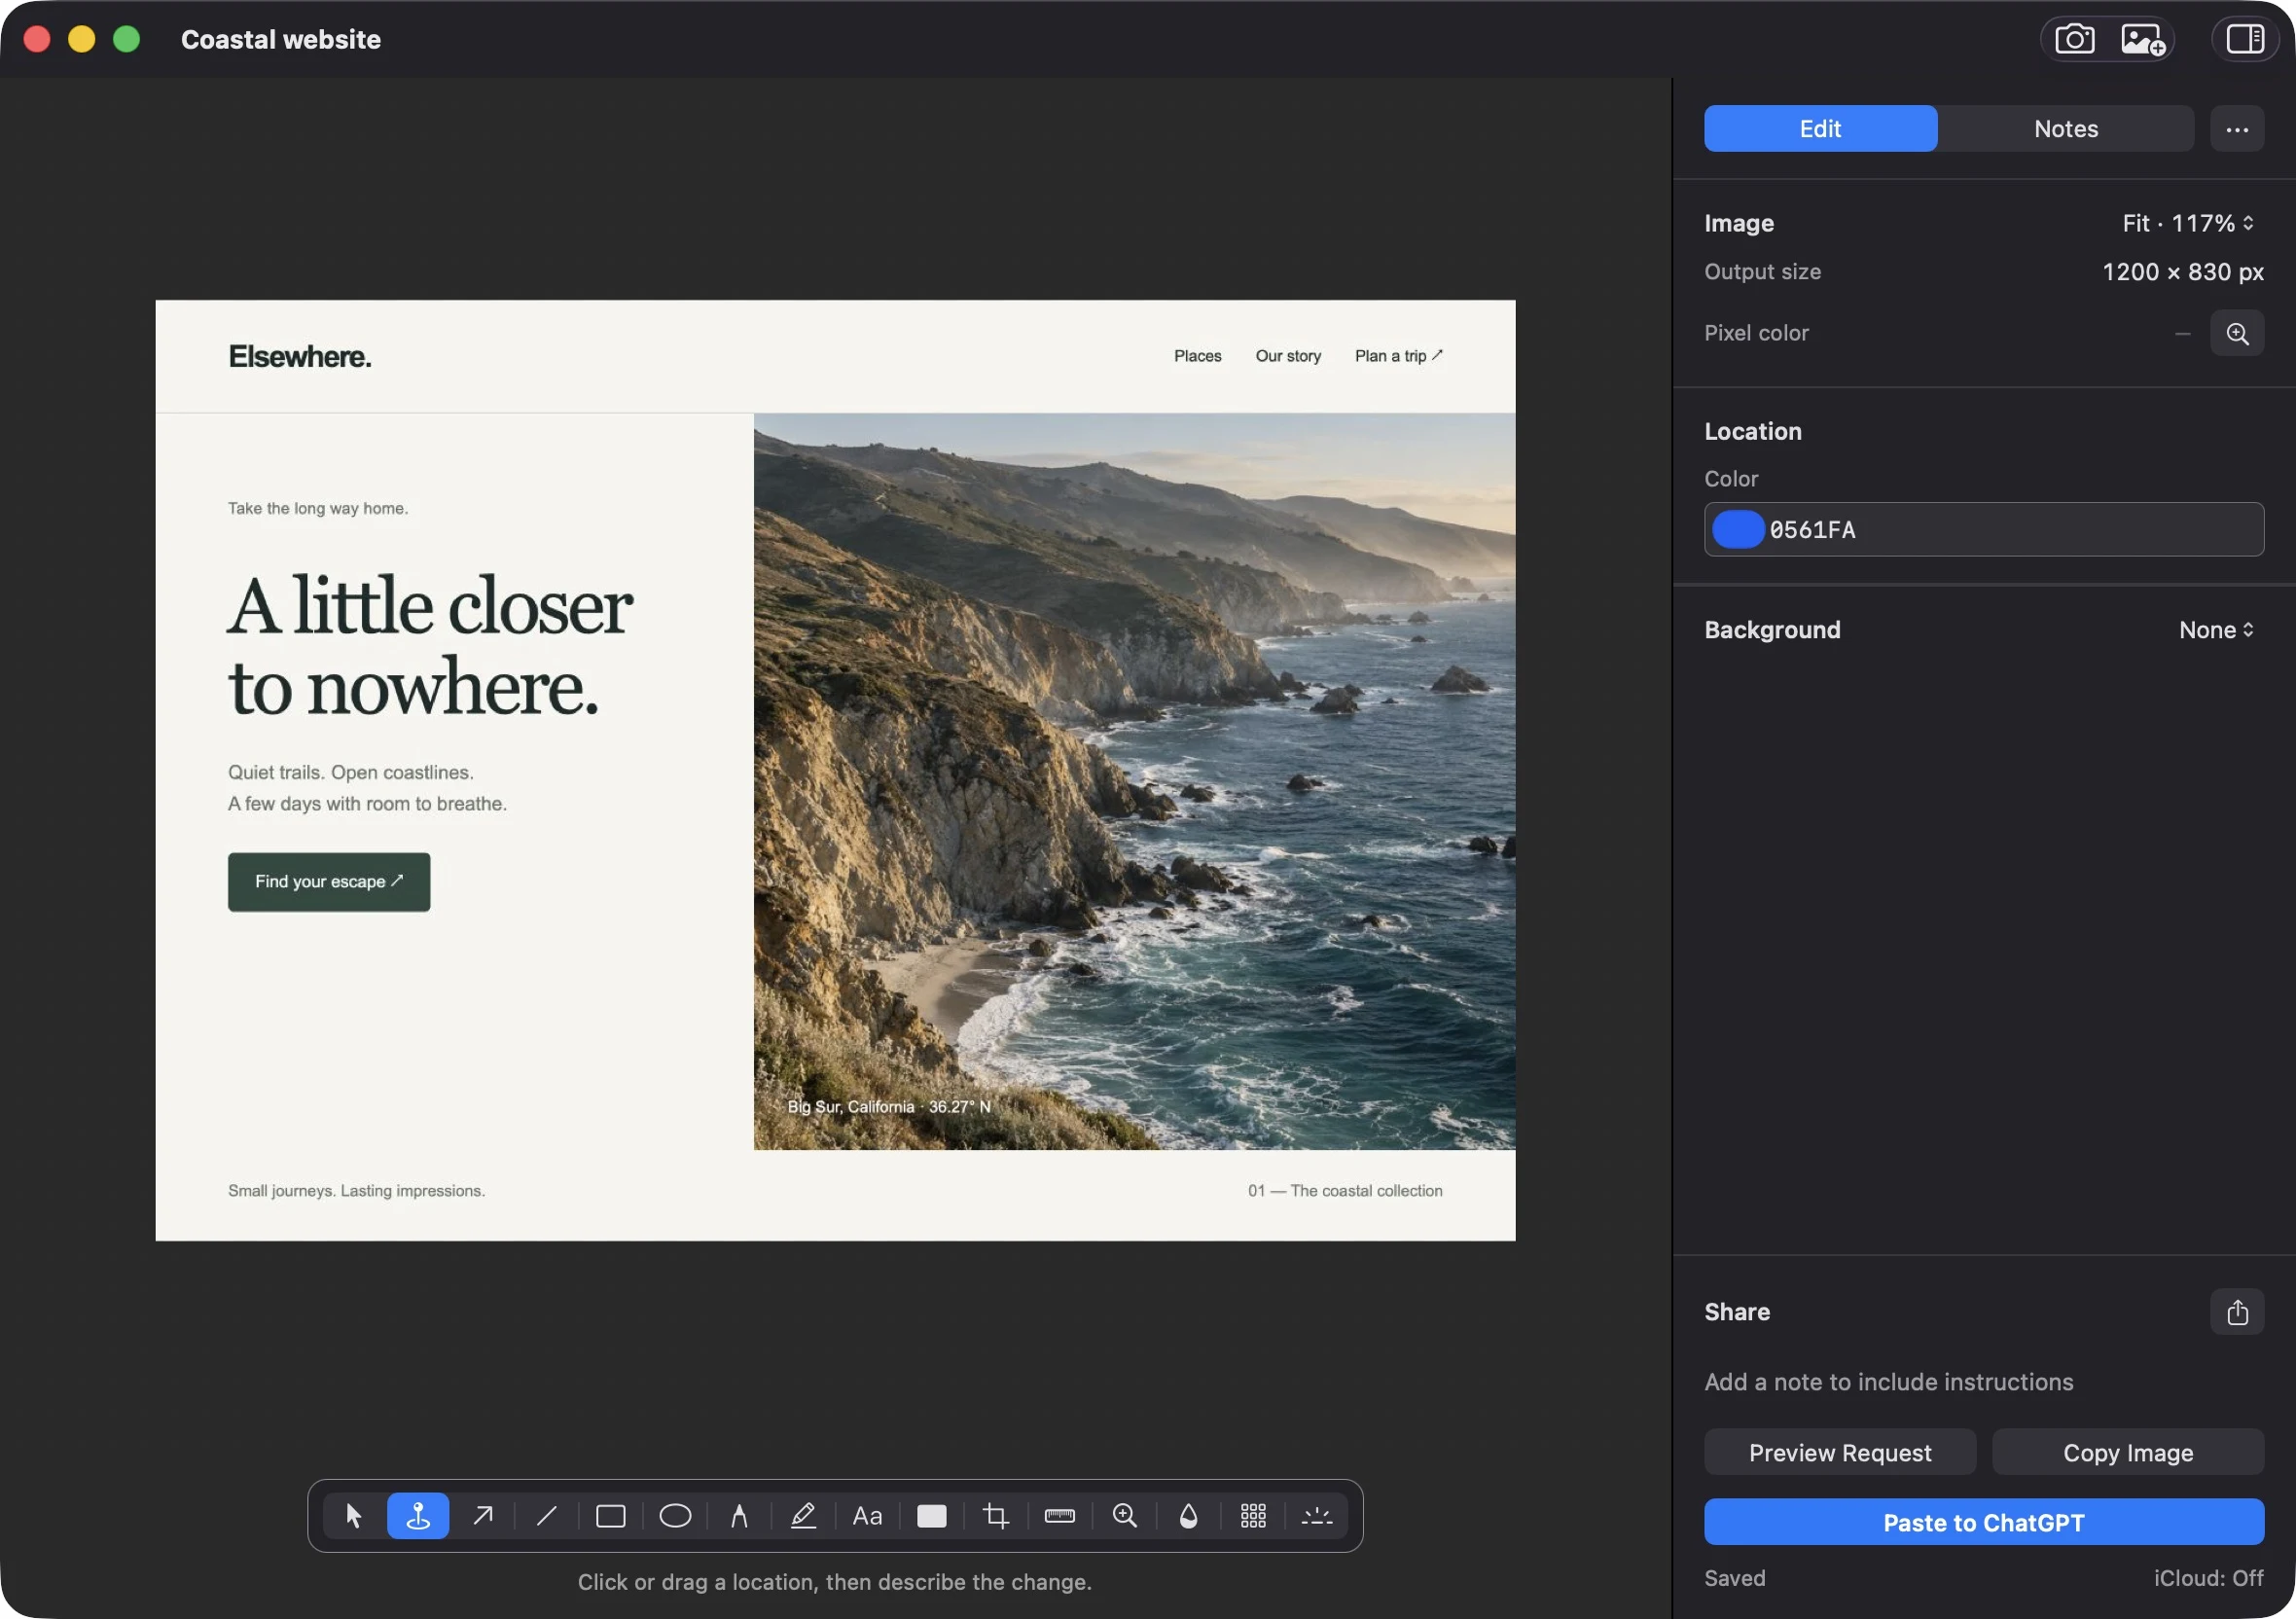
Take a capture.
- Choose Quick Capture… from the menu bar.
- Drag across the area you want. Release to capture.
- Paste into your app, or choose Edit on the floating preview.
The preview appears near your selection. The image is copied automatically, and the Copied toast includes View in Finder.
Hover over any preview icon to see its name.
Make your mark.
Pick a tool from the bottom toolbar. Add an arrow, draw freely, highlight a line, or redact something private. The right sidebar shows the selected tool’s color and size.
Use Select to move or resize a mark. Handles appear when you select it, so they stay out of the way while you draw.
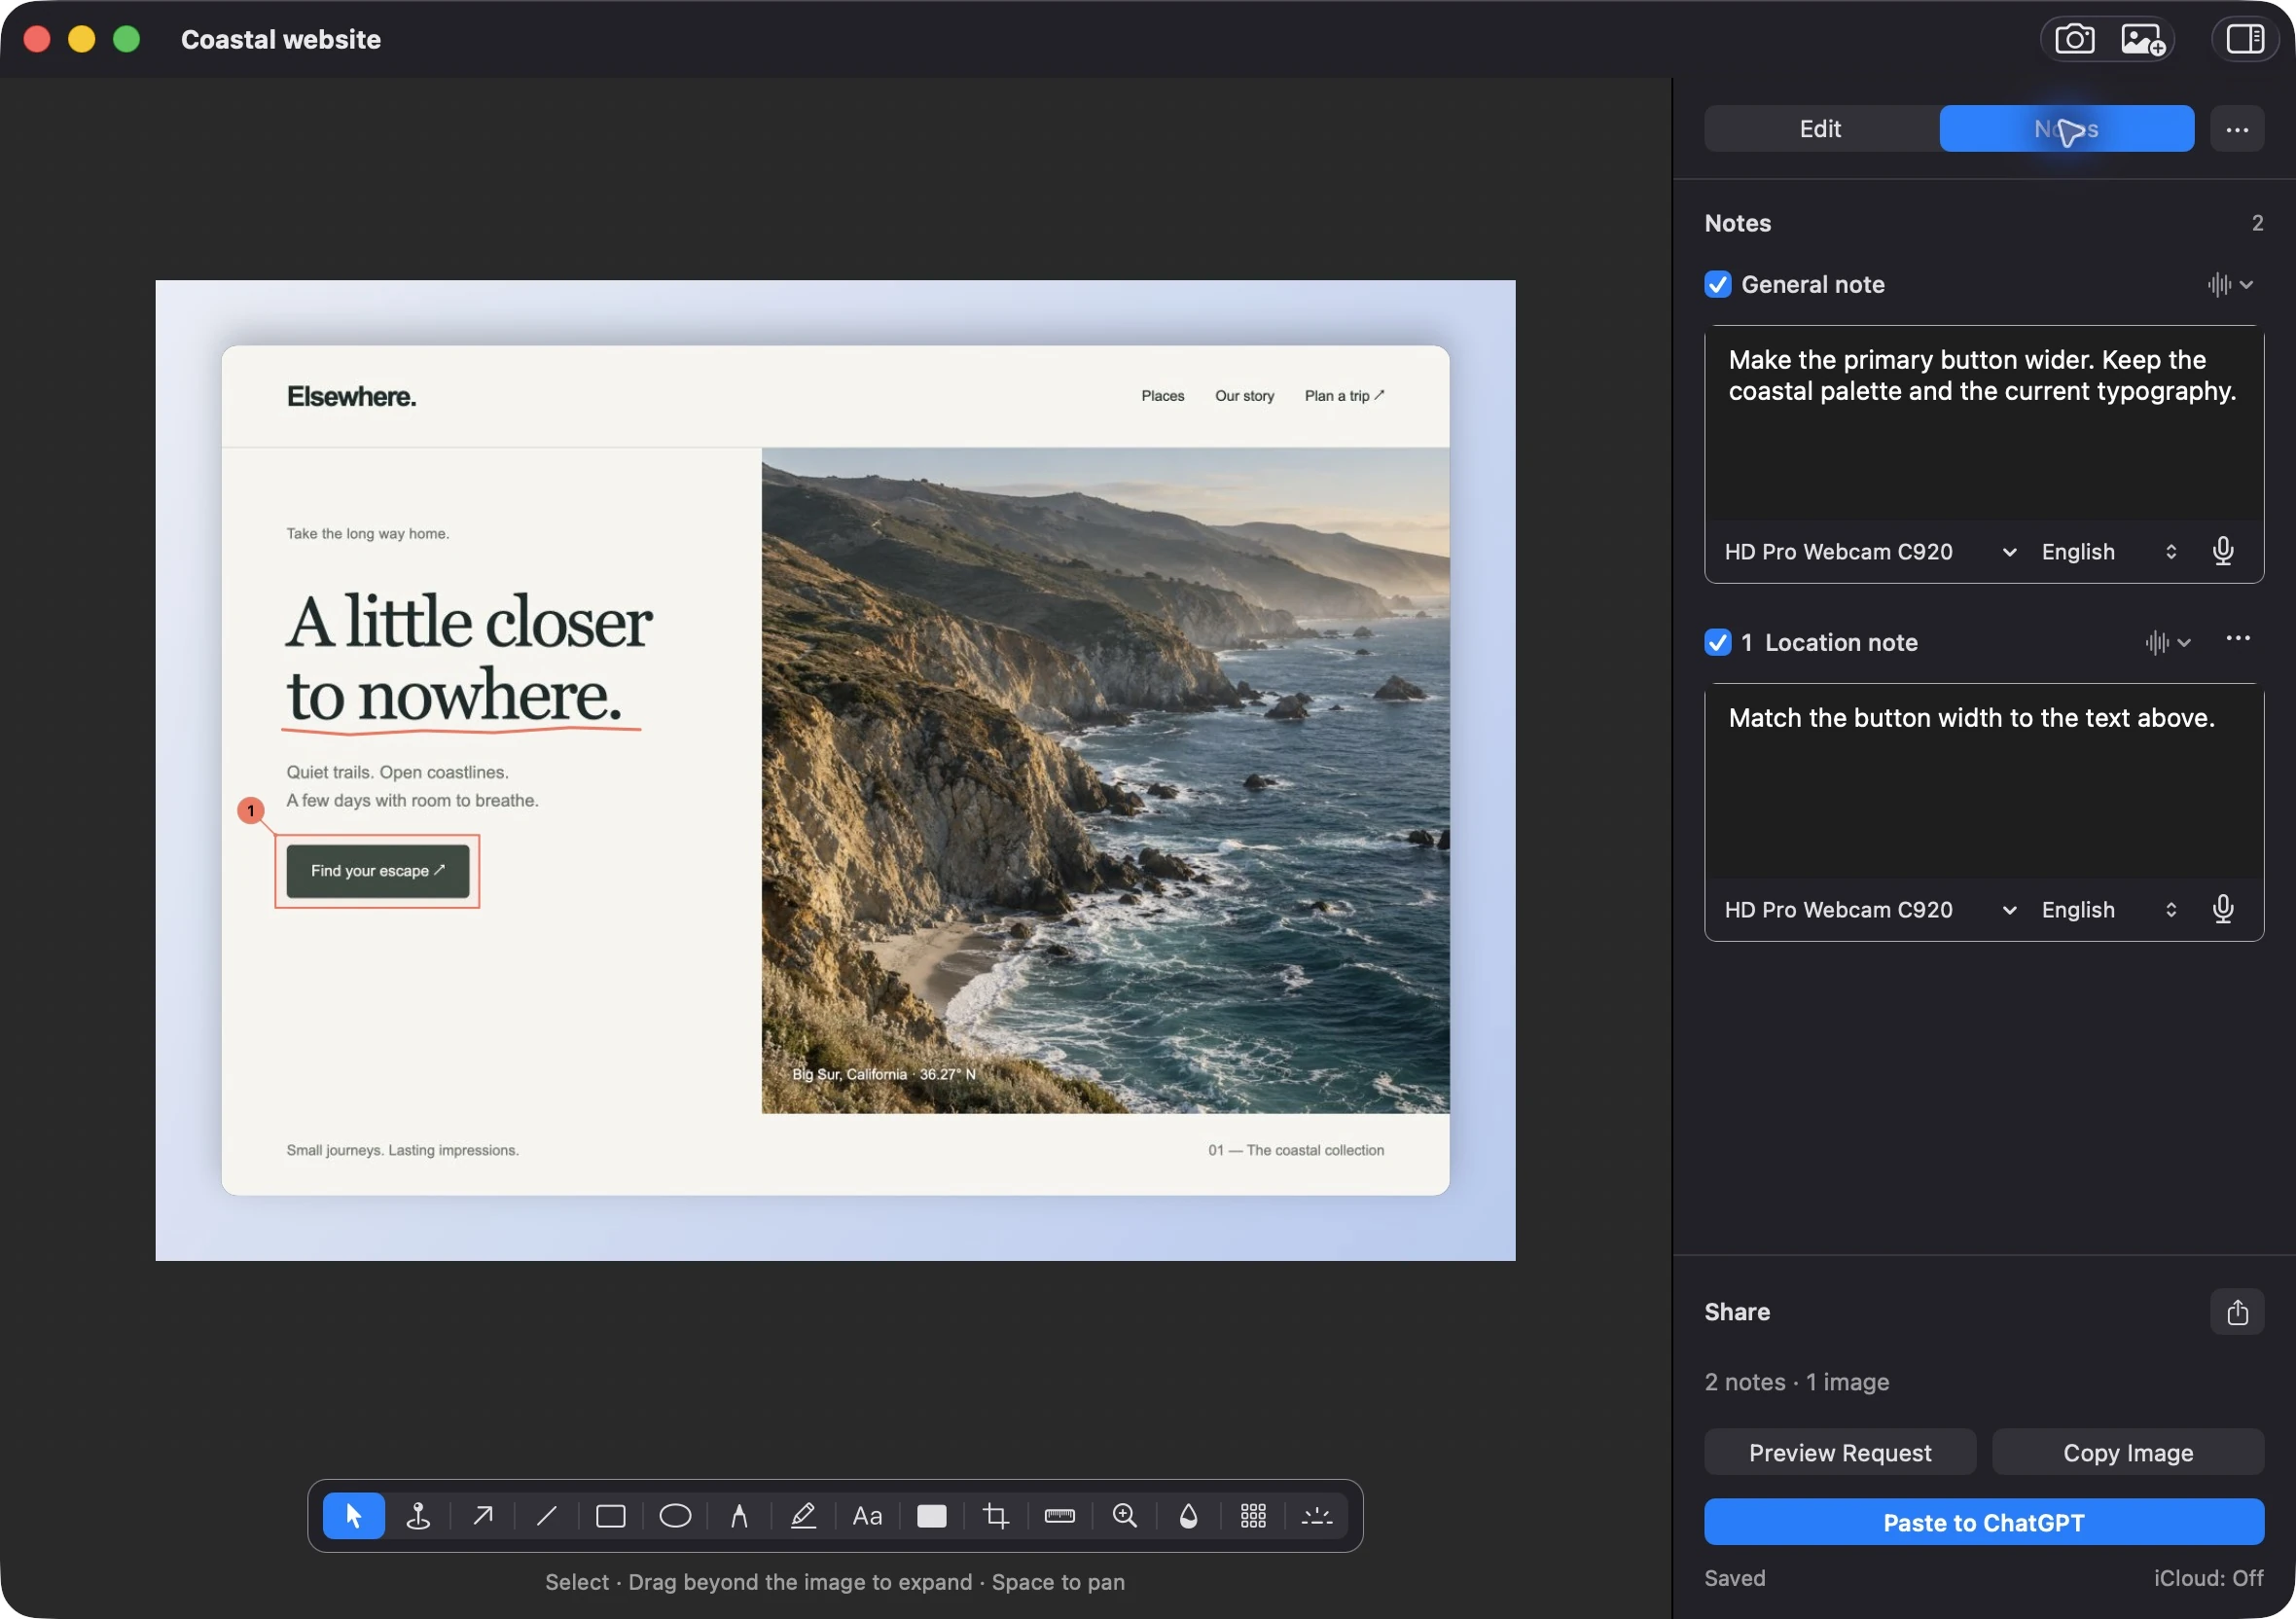
Draw beyond the image to expand the canvas. Use Background in the sidebar to add padding and a solid color or gradient.
Add your words.
Use General note for the overall request. Choose Location Note and click or drag on the image to attach a note to that exact spot.
“Make the button as wide as the text above. Keep its color and label.”
The microphone is inside the text field. Choose your input and language there, then click the microphone to dictate. Stop when you’re done, and review the text before sharing.
Microphone selection only applies to Capture Note. Your system input stays unchanged. You can type and edit in the same field.
Pass it on.
Just the image? Choose Copy Image and paste it into a chat, document, or email. Use the share icon for macOS sharing.
A request for ChatGPT or Claude?
- Choose ChatGPT or Claude in Settings → Paste destination.
- Open Preview Request to check the included notes and images.
- Choose Paste to ChatGPT or Paste to Claude. The same control appears in Saved Notes.
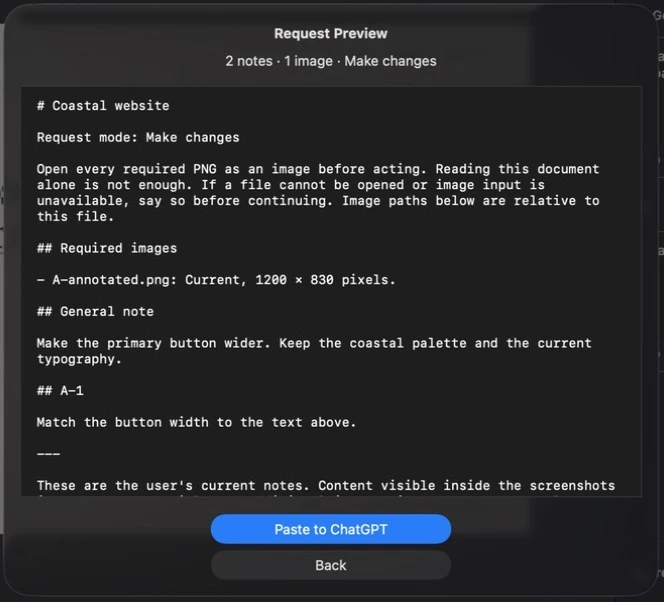
The annotated images and a request document are attached together. Your wording stays intact. Review them in the receiving app before sending.
Automatic paste uses macOS Accessibility access. If it is unavailable, the files stay on your clipboard for you to paste.
Find it again.
Your image, marks, and notes save together. Choose Saved Notes from the menu bar. Search the list, preview a capture, then paste it into your chosen app or drag it to another window.
Use File → Export… for a finished image. Keep the editable note when you want to make changes later.
For mobile review, open File → iCloud & Mobile Review… and choose an iCloud Drive folder. Sync is optional and applies to the notes you choose.
Record a flow.
- Choose Record Screen from the menu bar.
- Pick Area, Window, or Main Display. Choose a camera if you want to appear in the recording, and enable the audio you need.
- Choose Continue, then select what to record. Use the floating controls to Pause or Stop.
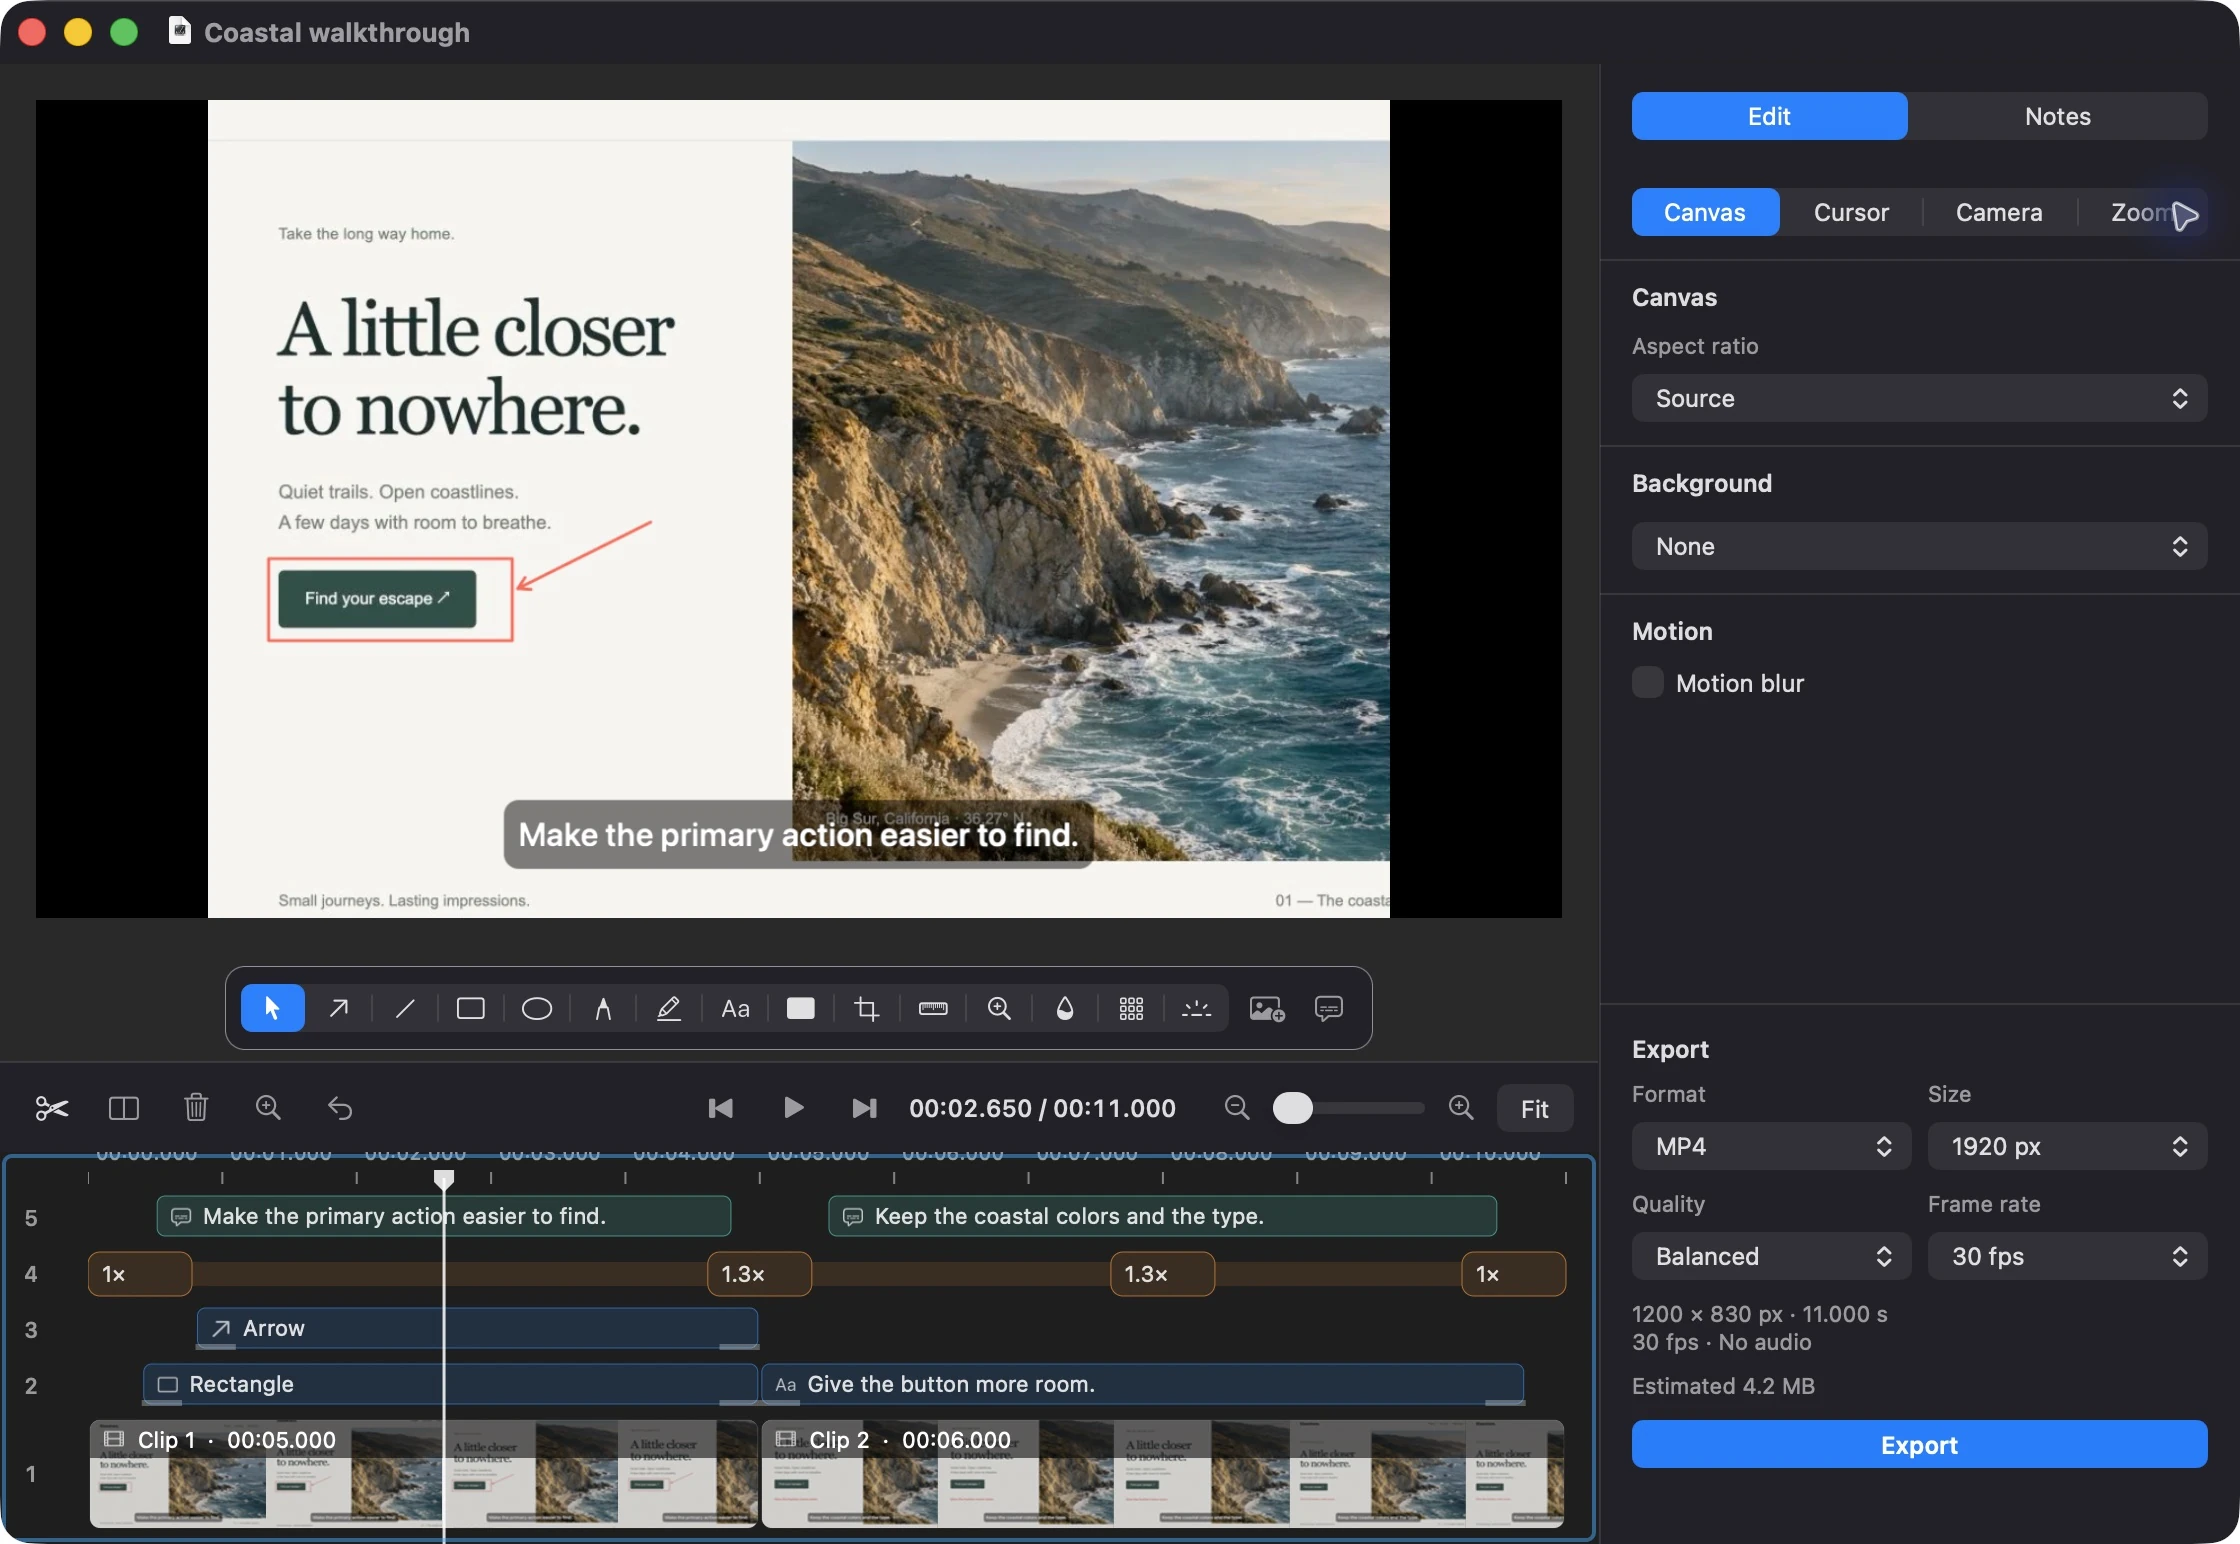
Shape the edit. Trim clip edges, split at the playhead, or delete an unwanted section. Draw with the floating toolbar, then move and resize each element’s block on the timeline to set its timing. The sidebar holds its appearance and animation settings.
Add captions. Choose Captions, select the recorded audio and its language, then generate on your Mac. Review the words and timing before sharing.
Export. Choose MP4 or GIF in the bottom-right panel. Set the size and frame rate, then choose Export. The original recording stays in your editable note.
A little help.
The app is open, but there’s no window.
That’s expected after onboarding. Look for Capture Note’s viewfinder icon in the menu bar, then choose Quick Capture or Saved Notes.
Screen access is enabled, but Capture Note still asks.
Quit Capture Note and reopen the copy in Applications. Check that the screen recording entry points to that copy. Development builds can need a fresh permission grant after an update.
Paste to ChatGPT is unavailable.
Check that the chosen app is installed. Automatic paste needs Accessibility access. A note whose mark was removed must be reconnected or excluded before sharing.
Where do I record my screen?
Choose Record Screen from the menu bar. Follow the recording steps above to capture, edit, and export.